Probably the most convenient source of satellite imagery for much of the Americas is found at the NASA Marshall Space Flight Center’s website. But that site might seem somewhat intimidating at first glance. Here I quickly describe what you need to do to see what you need around eclipse day – or any time you are traveling in Latin America (there are many comparable websites that do a good job of providing imagery for the CONUS and nearby areas).
The first step is to go to the basic link: https://weather.msfc.nasa.gov/GOES/
you should see this:

The basic menu of different images available at the NASA MSFC website.
this shows you that there are many different channels (frequencies of radiation) that the satellite monitors. For your purposes the visible channel Band 2 “red” is of most interest since this approximates what your eye would see. It also has the highest spatial resolution (500 meters at the point beneath the satellite) so you can see more detail.
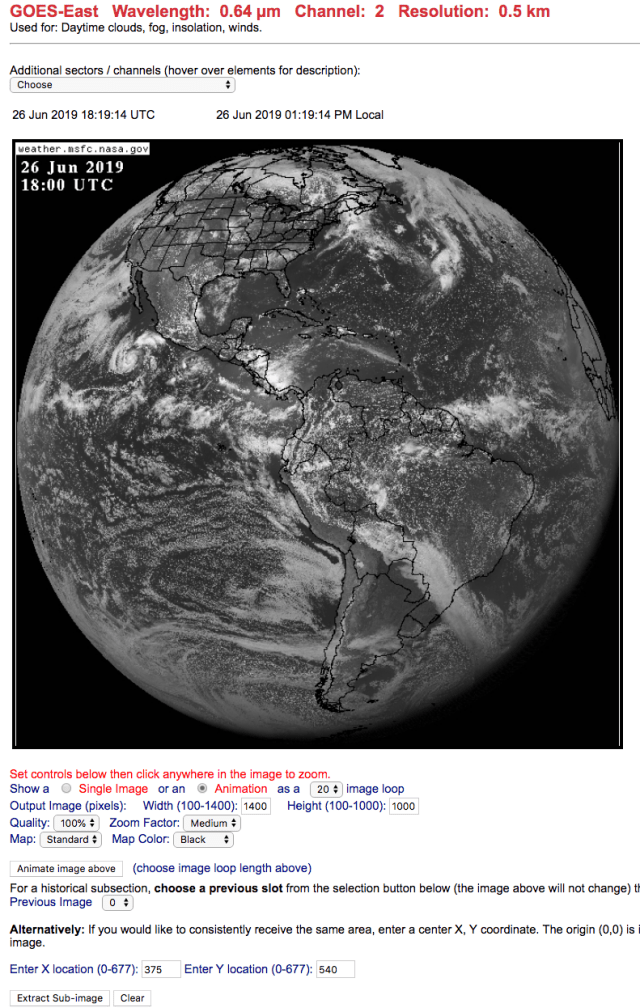
Next step is to select (click on the thumbnail image) for the Full Disk Band 2 sector; you get something like:

Default settings when you access the page for the first time.
The numbers that appear in the settings boxes are default settings and you can change these!
Believe it or not, the image above is updated every 10 minutes (this new generation geostationary satellite is much better than previous versions that have been around since 1974.)
But the full disk image still isn’t detailed enough for your purposes so you just fill in the “options” for the image you want. I have done this for you to cover the La Serena into Argentina area of the totality path – here is a good set of options to start with:
Zoom factor: medium, quality: 100%, Map: standard (you can get rid of coastline and political boundaries with the “none” option), and the location of the sector you want within the entire image (you play with these numbers to get the area you want – if you want to see exactly the same area every time (write the numbers down!). You can also point at the image above and click on a location. For a Medium resolution image (1km resolution) the x and y positions I chose are: 375 and 540.
Last but not least – select “Animation and chose the number of images you want to animate (max is 50).
Your internet connection speed may force you to limit the quality, size and number of images you want to animate!
Thus, your setting should look like in the following image – and then you click on the “Extract Sub-image” box (or just hit return).
settings for a Medium zoom factor animation of images
Your image (actually a loop of 20 images) should show this sector:
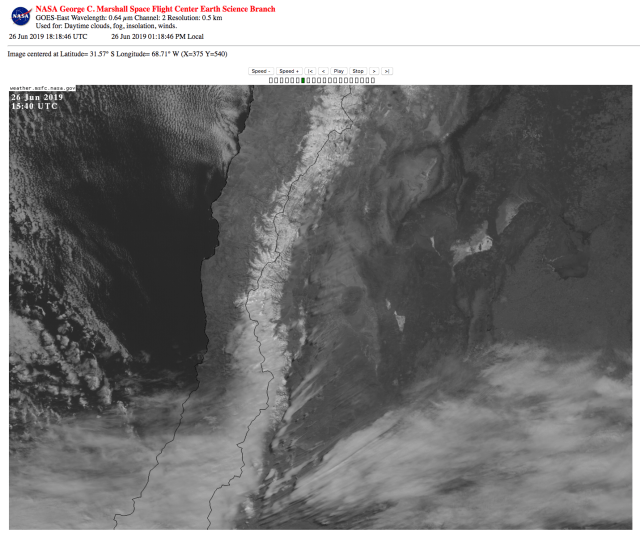
Medium resolution image (1km) – useful for a larger area view of the clouds.
FOR HIGHEST RESOLUTION IMAGERY just change the Zoom Factor setting to “High” and change the x and y positions slightly (to better center the box on the La Serena and western Argentina area) to X=370 and y=535.
You will get a sector like:

FULL RESOLUTION IMAGE OF THE LA SERENA AREA. I find that the coastline option prevents seeing details of the actual coast – when the coast is clear, but if there are clouds you will want to keep the map option selected. Note that there is lots of snow in the high Andes east of La Serena. Most of the high passes to Argentina are probably closed. You cannot easily tell snow and salt flats from clouds in visible imagery – unless you animate the images. Animation also allows you to see the cloud motion and any dissipation for helping with making short-term forecasts.
Click on any of the above images to see the full-size images you should expect to see on your computer.
SORRY FOR THE LONG-WINDED EXPLANATION; FOR MOST OF YOU THIS WILL BE INTUITIVE.
